aqua scroll template

Monday, August 10, 2015

Weekend Project Upcycled lamps


 Hi guys! I rewired and upcycled a couple lamps this weekend. I got this vintage base this summer at an antique auction. I couldn't find any info on it online, but just thought it was marvelous!. I think it is probably 1970's era. The riser was rusted and the wiring gone. This "painting" is Grant Wood's American Gothic. My mom always calls them "the cornflakes couple" as there used to be an old Cornflakes commercial with a spoof on this couple.


I added new lamp parts and a new riser made from an old trophy piece that Ed had left on the coffee table. He bought several vintage trophys to salvage and sell on EBay and only wanted the tops and marble bases. It worked perfectly! Now I am eyeing the rest of his "discards"! lol.

 I made this lamp from a vintage wooden surveyor's tripod. I added new socket bits I sprayed hammered bronze to "blend in more" and new reproduction cloth covered wiring that Ed sells in his Etsy shop The Industrial Farmer.


   It just looked better than regular cord.

 I added a shade I made with a vintage lampshade wire frame and chicken wire. I plan to add an Edison light bulb too. These are headed to my upcoming shows as I HATE shipping lamps! I have a lot more "project lamp bases" sitting around..I need to get cracking! Hope you had a fruitful, peaceful weekend! Stop again and see what I am up to. Comments loved, followers adored! Til next time! Julia

Saturday, August 8, 2015

Even creepier vintage dolls and new old stock shoes..New finds


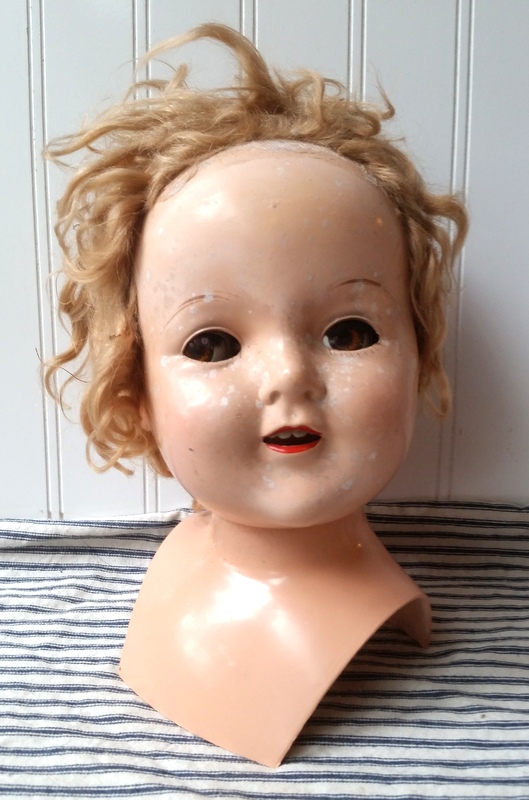
 OK ..THIS doll is truly horrifying. I think I have a one or 2 even creepier still lurking in the boxes someplace, but this one is a contender!


 She is a composition Effanbee with an odd long torso. Yikers..this one makes Chuckie look like the cute kid next door!


 Creepy vinyl/rubber with a hard plastic head..


 She has a sweet expression though so she doesn't scare me like the other one.


 This shabby composition head has eyes that are weighted to be side glancing when you tip her head sideways.


 A bit jarring when you don't realize that and pick the head up and the eyes move!


 Skeptical face...


A shabby bald Madame Alexander.


                                              A cheerful shabby creepy baby.


 Boo! I think some of these would be great to pose for creepy art photos. I am lucky to keep my fingers out of my pix!


 When we went to the country store sale in June we bought boxes of vintage new old stock leather ladies pumps. Never worn..note the dust! They are still stuffed with tissue.


 Getting ready to list these on Ebay, but  I have no clue of the size..neither the shoes nor box are marked w/ a size. There are letters and numbers, just none that make sense as a size. They are smallish and narrower than my big wide feet!


I think they are 1940's era. Too cool! Hope y'all have a great weekend. I will be busy working on projects. Stop back and see what I have been up to! Comments loved, followers adored! 'Til next time! Julia

Thursday, August 6, 2015

Cute and Creepy vintage doll heads


 EEK! Hi guys! I dug some more heads out of the boxes today (is it me or does that sound bad?lol) Some I think are cute and some are creepy as hell. This one above is in the later category for me!


 This one is sweet..she has crazy poofy hair but nice skin!


 An eyeless Patsy or Patsy type head. I think this would be cool with a mini LED battery tea lite inside!

  I think this one was a Horsman..she bridges creepy and sweet.


 OK..ol' dead eyes is creepy as hell!


 Sweet..I think she formerly had a wig.


 This shabby sweet baby is marked Hug Me Kiddie Pals. He/she has tin eyes.


 OK..Creepy but I love this crazy ass one. My hair has looked like this in the morning! A gal after my own heart..not literally I hope...


 This is a sweet one..bald and beautiful..I have sold a couple of the larger ones for "display" mannequins.


 ..pushing the creepy envelope....


 Medusa! Her hair is even better from other angles.


 Ok..don't let her smile fool you..creepy!


 It is all in her wacked out eyes!


Bad hair day but sweet. Bad forehead day too as she has a big old dent!


                                               Worse hair day..


 Another bald and beautiful large girl. Her head is tilt-able.


 OK..I find this old Century Doll Co doll so strangely beautiful she is going to stay with me for awhile. She may end up an angel. She is marked 1924.

 A couple dolls headed for Ebay..this one is a Sun Rubber Company baby. If perfect, quite pricey..but of course 2 fingertips are missing.


 Another unmarked Patsy type with tin eyes. Sweet face!


 A vintage composition Shirley. Don't know if the outfit is original, it is vintage. The socks and shoes are vintage but newer than she is.


And back to creepy! This stuffed Santa is enough to give you nightmares! But creepy sells so off he goes. I have literally only gotten into one layer of doll boxes. Stop back and see what else I find. Comments loved,followers adored! 'Til next time! Julia

Monday, August 3, 2015

Vintage Millinery style melted flowers DIY tutorial


Hi guys! I am not much of a tutorial-er,but I am a DIYer! Today I am sharing how I make melted flowers. NOTE this is not for the easily burned or clumsy! High heats are used! Proceed with caution and don't start a fire!


 I start with sheer polyester fabric..silk or cotton will not work! Must be synthetic! I cut a square to the size I want, round it and cut in slits and trim off a few corners for petals. 4-5-6..whatever. More petals= frillier flower.


 I layer these trying to vary the slits (center a slit over a petal on the next layer) ..about 4-5 of the petal layers and secure with a stitch or 2. NOT glue! Glue will not work when you add the heat.

 I usually make these on glass plate on my glass stovetop for safety. Make SURE it is a heat proof surface!

 I use a quarter for a spacer to keep the petals from closing into a wad. I have also used a flat backed glass florist "pebble" It must be heat proof!


 Magic tool..embossing gun..hair dryer will not work...it won't get hot enough.


 Lightly, carefully, slowly melt a petal at a time. The second it starts melting, back off the heat tool. You can always melt it further if you want..GO EASY. I use a spoon or fork or wooden skewer/chopstick to pin the quarter and flower down to keep it from blowing away. DO NOT use your fingers!


 I work my way around the inner petals..again..DO NOT touch with your fingers..hot plate, hot quarter, hot material! (When learning, I'd keep a bowl of water near just in case something starts burning!)


 I apply less heat to the outer petals and concentrate on just the tips. Let cool. Shake out quarter (don't touch it)..done!

                                     
 On these I added a rolled rose center. Tons of how to's on the web or check my how to post here http://www.hopeandjoyhome.blogspot.com/2013/09/warm-and-natural-rolled-no-sew-roses.html if that link doesn't work, it is my 9/20/2013 post on this blog

 Back view..I just make these smaller using a shorter and narrower "coil".


Before and after on the petals. Note they shrink quite a bit..keep that in mind when cutting your petals out.


Hot glue in your middle bits....you could add whatever you wanted to the center..rhinestone button or bling or pearly beads.


I added leaves I made out of vintage tinted French dictionary pages.


Tres chic? You can use these flowers on tons of applications and make them in any color of sheer poly you have. Work yes but cheap cheap cheap per flower. I use warm and natural over felt because you can get tons of flowers out of a 1/2 yard for way less than felt..and it looks nicer than the cheap felt does! Comments loved..followers adored! Stop again and see what I am up to! Til next time! Julia